How to Make a FNAF 2 Marionette Scene AI Video
Make a FNAF 2 Marionette scene AI video from one photo. Compare the 15- and 30-second cuts and check the lead's face in the dark frames.
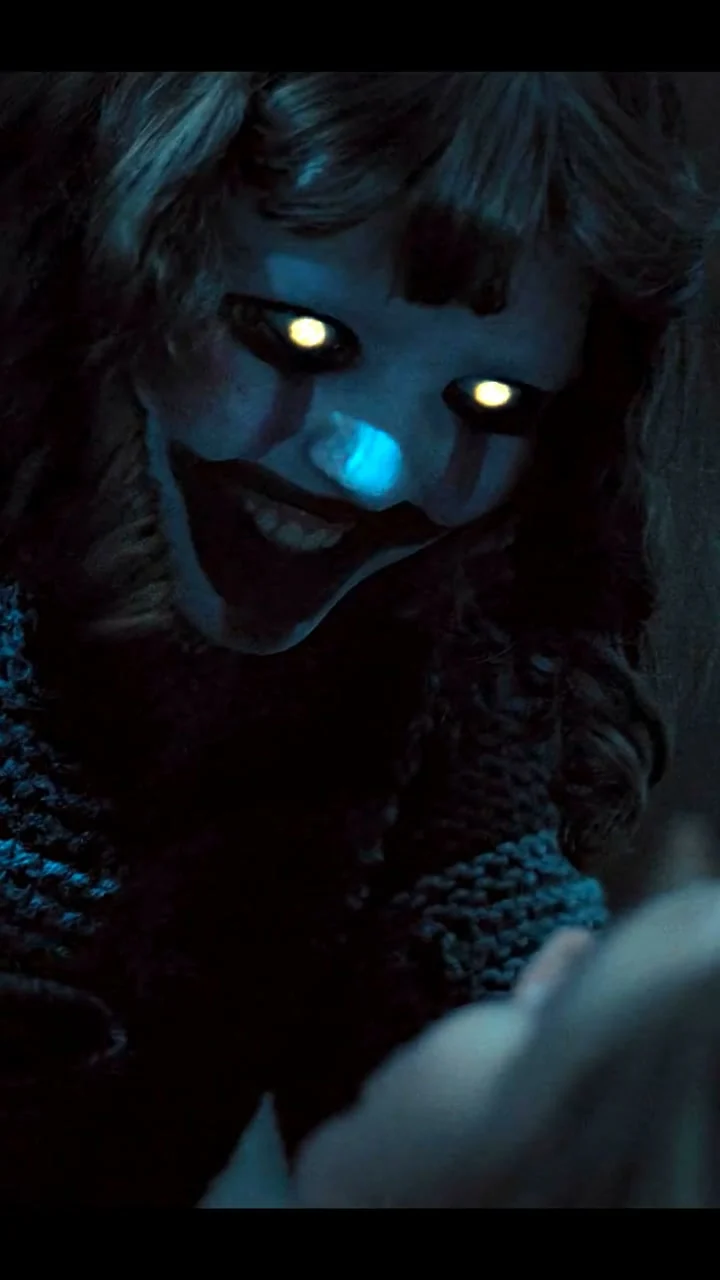
A masked face with glowing eyes appears in a dark house. The lead runs, checks behind a door and meets the Marionette. The Five Nights at Freddy’s 2 Marionette Scene template puts one person from your photo into that FNAF 2 fan edit. Pick a 15- or 30-second vertical cut, then check the generated face through the darkness before posting.
FNAF is short for Five Nights at Freddy’s. Here it names a specific scene-style video, not a general FNAF avatar maker: your photo casts the human lead, while the Marionette remains the creature in the source footage. Two separate roles. That division matters more than a spooky caption.
One photo casts the lead, not the Marionette
The live form asks for one required photo of the lead character. The source shows a woman in a dark blue jacket facing the Marionette, but the template says a person of any gender can take that human role. Your face and hair come from the upload, as does your general look. The reference supplies the creature. It also supplies the house and cuts.
Pick a clear photo of one person with a visible face and good lighting. An upper-body frame shows enough clothing to guide the character’s look without shrinking the face. Outfit transfer is possible, not assured, so wear something you wouldn’t mind seeing in the generated scene. Skip sunglasses. Heavy filters won’t help. A shadowed selfie might match the movie’s mood, but it gives the model less to work with once the hallway goes dark.
The Marionette’s mask and glowing eyes should stay with the creature. So should its striped arms. Your face belongs on the lead, never on the mask. Check this in the output as well as the upload: an instruction on a template page is an aim, not proof that a render followed it perfectly. Use your own likeness or a consenting person’s photo, and label the edit as fictional when you share it.
For a different Halloween fright built from a still image, see the Haunted Elevator photo guide.
Decide where the scene should stop
The template’s two source previews are reference clips, not results personalized with someone’s photo. The 15-second option covers the first confrontation and the run, ending around the door beat. Choose it if you want the suspense to stop there. It’s a clean reaction format: the viewer sees the threat and then the lead has to move.
The 30-second option follows the same opening into the attack, with the lead caught on the floor. That makes the edit more explicit and harder on facial consistency: as the camera cuts from the pursuit to the moment on the floor, your lead still has to look like the person in the uploaded photo, even when the lighting and framing change abruptly. Don’t use the longer version just because more footage sounds better. Pick the ending that fits your post and the audience you want to reach.
Both options are vertical 9:16; the live form offers 480p or 720p. Credits vary with duration and resolution, so check the amount shown before generating. No guessing. The source preview includes audio, but the final result still deserves a full sound check. Don’t use the muted website preview as evidence of how your rendered clip sounds.
Make the FNAF 2 edit and inspect the dark frames
- Open the FNAF 2 Marionette Scene template and upload one clear photo for the human lead. Don’t add a separate Marionette photo; there is no creature slot.
- Select the 15-second suspense cut or the 30-second cut that continues into the attack. Choose 480p or 720p after checking the credits in the form.
- Generate the result. Watch the hallway run, the turn toward the door and any close shot where the face catches light. In the longer cut, review the floor sequence too.
- Make sure the same person appears in every human shot and the Marionette has not inherited the uploaded face. If either fails, change the source image or treat that render as a miss rather than posting it as a convincing scene.
The dark lighting can hide a bad swap at a glance. Scrub slowly through the moment the lead looks back: that’s when a face can shift while the eyes are small in the frame. Then replay at phone size, with sound. Watch the eyes. A crisp thumbnail isn’t the test; the moving result is.
The source fan edit also carries yellow burned-in subtitles and black bars. The template asks the model to omit subtitles and on-screen text, but it warns that some may remain. Check for stray words before adding your own caption. You don’t want a movie line colliding with a new line of text across the lead’s face.
Caption the scene without passing it off as official
A caption like “I checked the door. I shouldn’t have.” sets up the jump without claiming the person in your photo acted in the film. If you post the 30-second version, consider a content note for the attack on the floor. Platform rules for synthetic likenesses and film footage can apply; getting a usable render doesn’t by itself grant distribution rights to the scene or its audio. This is an independent fan-style AI template, not an official Five Nights at Freddy’s release.
If the longer cut leaves the lead unrecognizable during the final close-up, post the shorter cut only if that version passes its own review. The door beat works as an ending. It doesn’t need a broken extra 15 seconds to feel like FNAF.