How to Make a Pet Tissue Chop AI Video
Make a Pet Tissue Chop AI video from one pet photo, with tips for the face, paw-to-tissue action, audio checks and a truthful posting angle.
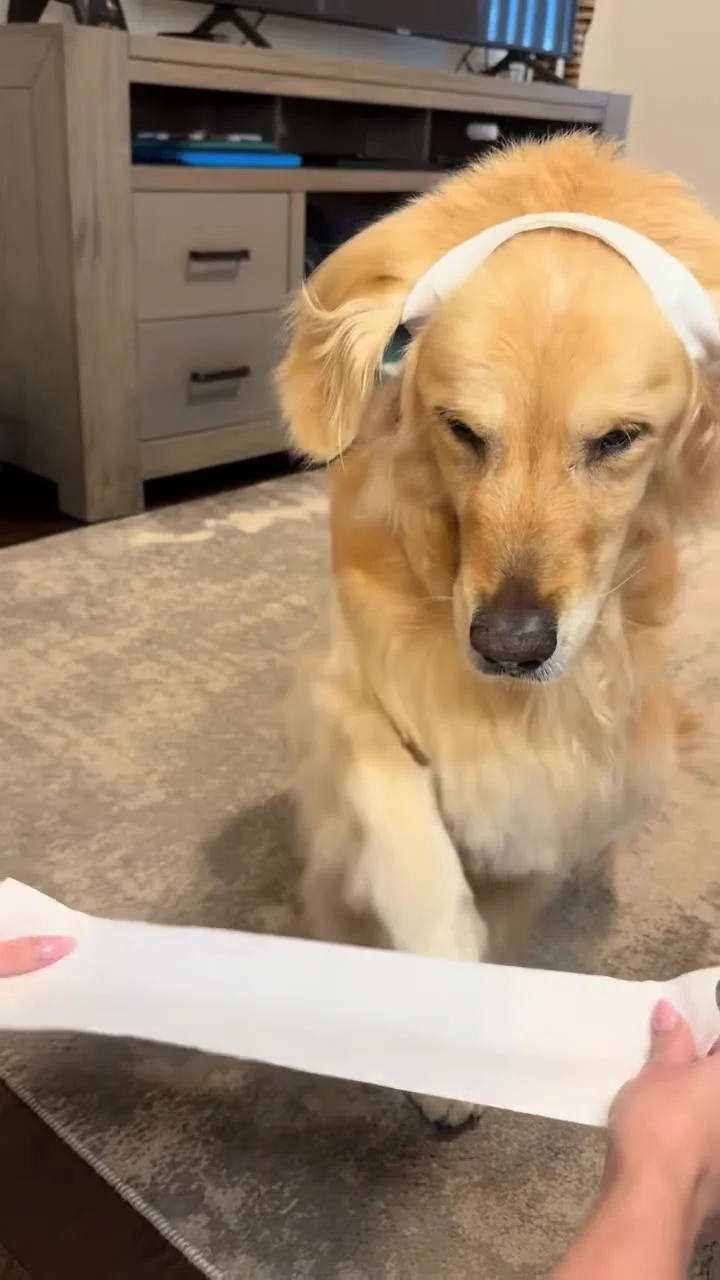
To make a Pet Tissue Chop AI video, upload one clear photo of your pet to the Pet Tissue Chop template. It places that animal in a vertical scene where a headband-wearing pet paws at a strip of tissue held across the frame. Choose a photo that keeps the face easy to recognize, then inspect the paw-to-tissue moment before posting.
The joke lives in the pause before the paw
The source preview on Trendai shows a golden retriever on a rug, wearing a white headband while two hands hold a tissue in front of it. Its paw comes down on the strip. The setup takes itself just seriously enough to make a tiny pet movement feel like a movie fight scene. That’s the joke. Keep it small. No elaborate backstory needed.
It’s a source reference, not footage of what your pet will do in a finished export. The poster is also a frame from that reference. You can’t use either to judge how well a different animal’s face or paw will land in a new generation.
This is a one-pet gag, not a two-character casting exercise. In the Cat Barista Duo guide, the interest comes from two animals sharing a counter and their separate photo roles. Here, the prop is the other half of the scene. Your pet gets the single starring slot; you don’t upload a hand, another pet or a replacement room.
Give the single upload a fair shot
The live form labels its only photo input “Your photo: your pet” and marks it required. Its help text asks for one pet with a clear, well-lit face, sitting upright. The form accepts JPG, PNG or WEBP. There are no optional second-pet or hand-photo slots in this template.
Pick a frame with visible eyes and ears. Keep the nose in focus too. For a fluffy dog, avoid a paw or toy blocking the muzzle. For a cat, use a seated shot instead of one curled into a ball; the reference action needs a body that can plausibly face a strip held in front. This is a photo-selection tip, not a promise that the generation will reproduce your animal’s real movement.
Keep some room around the head and chest. A portrait so tight that it cuts off the shoulders may make the headband look crowded or leave the paw action harder to read. You don’t need to stage a real tissue chop to supply the upload. Please do not make your pet perform one for the camera just to prepare the photo.
If the pet belongs to a friend, ask the owner before using its picture. And if a person appears clearly in the input, get their permission too. The generated clip should be presented as a fictional pet edit, not proof that the animal learned karate overnight.
Make it in the live template
- Open the Pet Tissue Chop creation form and upload your pet photo to the required pet slot. Check that the preview still shows the full face; swap to a cleaner photo if the original is dark or cropped.
- Check the form’s Length · format row. It currently reads 14s · 9:16 · source audio. The separate Resolution control shows 480p as its visible default and lists 720p as another choice. Confirm the displayed credit estimate for your selected resolution in your own session before generating.
- Generate the video and review the actual export, not just the reference poster. Save the version only after you’ve looked at the chop frame and listened to the file yourself.
That vertical format is already suited to a phone screen. Don’t crop out the tissue just to make the animal’s face bigger: without the held strip, the raised paw loses its punch line. If you add a title, leave the strip and both hands visible in the decisive moment. The headband can be funny, but the tissue is the target.
Check what actually survived the cut
Watch once with the sound off. Can you tell where the paw is meant to land? The strip should be readable as a thin, held object rather than a white bar floating in front of the pet, because the contrast between a solemn martial-arts setup and such a flimsy target is what makes the action legible even before you hear a sound. Pause around the contact moment and look for a paw that merges into the tissue, a hand with an odd number of fingers or a headband that jumps between positions. Quick motion can hide these on the first pass.
Then watch with sound on. The form explicitly names source audio, and the page describes audio from the reference clip, but neither verifies the soundtrack in your personal export. Listen for abrupt cuts. Check for missing sound and any audio you don’t have rights to publish. If you replace or add music in TikTok or Reels, use audio you’re permitted to use there rather than assuming the reference clip gives you a license.
Check the face again after the paw moves. The pet should still resemble the animal in your upload, especially if the first frame looks convincing but later frames drift. A charming freeze frame won’t save a clip in which the dog turns into somebody else’s dog halfway through. Faces can drift.
Post the tiny victory, not a fake pet stunt
Try a caption that sets up the stakes before the swipe: “One training session. One tissue.” It explains the ridiculous challenge without insisting that the event really happened. Put any on-screen words high enough that they don’t cover the tissue. Let the held strip appear before the paw comes down, because viewers need to see the target to understand the hit.
A reaction shot from the real pet can work as a separate follow-up if you have your own footage and permission to use it. Keep the AI clip labeled as an AI-made edit, especially if you pair it with real footage. Don’t claim the animal actually chopped anything or imply the source scene is your living room.
For a different pet premise, browse the trend gallery; this specific template is strongest when the viewer spots the tissue before the paw moves. Before you upload, replay your export on a phone at normal speed. If the strip disappears under your caption at the exact hit, move the caption rather than trimming away the setup.